


When it comes to the art of wet shaving, shaving brushes are almost unanimously considered a must-have for anyone serious about a barbershop-quality shave. After all, your grandfather probably used one — and so did his grandfather. But are they absolutely necessary for everyone? Which type is right for you? How do you use one correctly, and how do you keep it performing for years? This guide covers all of it.
Everything you need to know about shaving brushes: From first purchase to flawless lather.
Why use a shaving brush?
A quality shaving brush isn't a luxury holdover from another era — it genuinely improves the shave. When used correctly, it lifts hair away from the skin before the blade arrives, drives warm water into the hair shaft to soften it, exfoliates dead skin cells, and builds a denser, more protective lather than anything from a can or your hands alone. The result is less razor burn, fewer ingrown hairs, and a noticeably closer shave.
There's also a practical upside: a brush produces significantly more lather per amount of cream than applying by hand, which means your shaving cream goes further and lasts longer.
Is a brush absolutely required? No — if you have non-sensitive skin and a good soft-formula cream, you can get by without one. But once you've used a brush, going back rarely feels like the right move.
Understanding brush sizing
Three measurements matter when evaluating a shaving brush: knot size, loft height, and overall height — all expressed in millimeters.
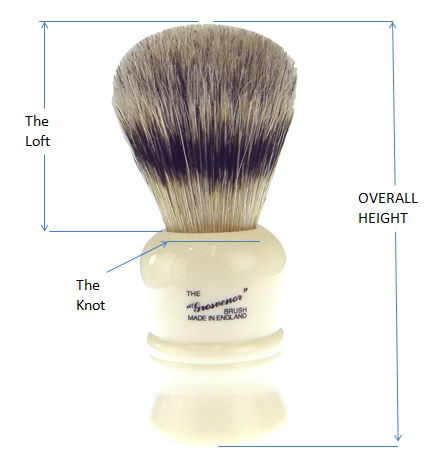
Knot size is the diameter of the hair bundle where it emerges from the handle. A larger knot means more bristles, more lather capacity, and a fuller feel on the face. The average knot is around 20mm; enthusiast brushes often run 24–28mm or larger.
Loft height is the length of the bristles from the base of the knot to the tip. A shorter loft produces a firmer, denser brush with more "backbone" — good for building thick lather quickly. A longer loft is softer and more pliable, holds more lather, and tends to feel more comfortable on sensitive skin. Average loft is around 50mm.
Overall height is simply loft plus handle length. Handle length doesn't affect latherability, but it matters for grip — some shavers prefer a shorter handle for control, others a longer one for comfort.
Bristle types: boar, badger, and synthetic
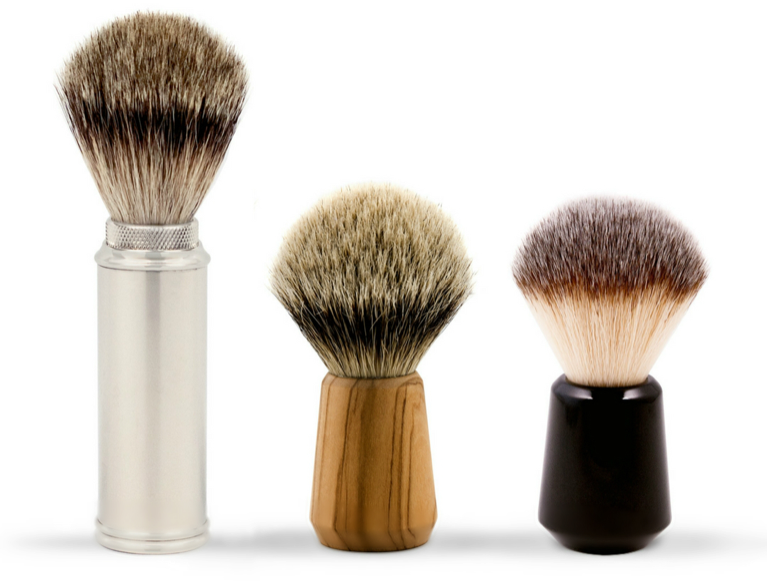
Boar hair
Boar brushes are the entry-level option — widely available, inexpensive, and functional. They're often labeled "pure bristle" or "natural bristle" and can be found at most drug stores. The trade-off: boar hair is noticeably coarser than the alternatives and requires a significant break-in period before the bristles soften. Lather-building takes more effort, and the natural hair requires more attentive maintenance. They're fine as a starting point, but most shavers eventually move on.
Badger hair
Badger has been the traditional benchmark for wet shaving brushes for over a century, valued for its softness, durability, and excellent water retention. Within the badger category, hair is graded by quality — from highest to lowest: Silvertip, Super, Best, and Pure. Higher grades are softer, retain heat better, and require shorter soak times. All grades produce a rich lather; the differences are mostly in feel and speed.
The downside: badger brushes are significantly more expensive, come with a break-in period, shed bristles early in their life, and carry a distinct wet-animal odor when new that can take weeks of washing to fully fade.
Synthetic fiber
Modern synthetic brushes have closed the gap with natural hair considerably — and in several practical categories, they've surpassed it. Synthetic fibers (typically nylon-based) are soft, fast-drying, cruelty-free, and require virtually no break-in. They perform at full capacity from the very first lather, don't carry any odor, and are easier to maintain. They also cost significantly less than comparable badger brushes.
The one area where badger traditionally held an edge — heat retention — is largely irrelevant if you're using the OneBlade LTHR Hot Lather Machine, which delivers consistently heated lather regardless of brush type.
Our recommendation: The OneBlade 20mm Premium Synthetic Brush — sized specifically for single-blade wet shaving, ready from day one, and a fraction of the cost of an equivalent badger brush.
How to build the perfect lather: 6 steps
For this guide, we're using a face lathering approach — simple to learn and ideal for softer shaving cream formulas.
What you'll need: warm water, your shaving brush, shaving cream, and a mug or bowl.
1. Soak the bristles.
Hold the brush under warm running water for at least 20 seconds, or leave it submerged bristle-side down in a cup of warm water while you shower. Keep the knot out of standing water when possible — prolonged moisture exposure at the base can loosen bristles over time. Use warm water, not hot. If it's too hot for your skin, it's too hot for your brush.

2. Shake out the excess.
Remove the brush and gently squeeze the knot from base to tip to remove excess water. You want the bristles moist, not dripping.

3. Load the brush with cream.
Take a quarter-size amount of shaving cream and work it into the tips of the bristles with your fingers. This gives you more control than dipping directly into the container and prevents overloading.

4. Build the lather on your face.
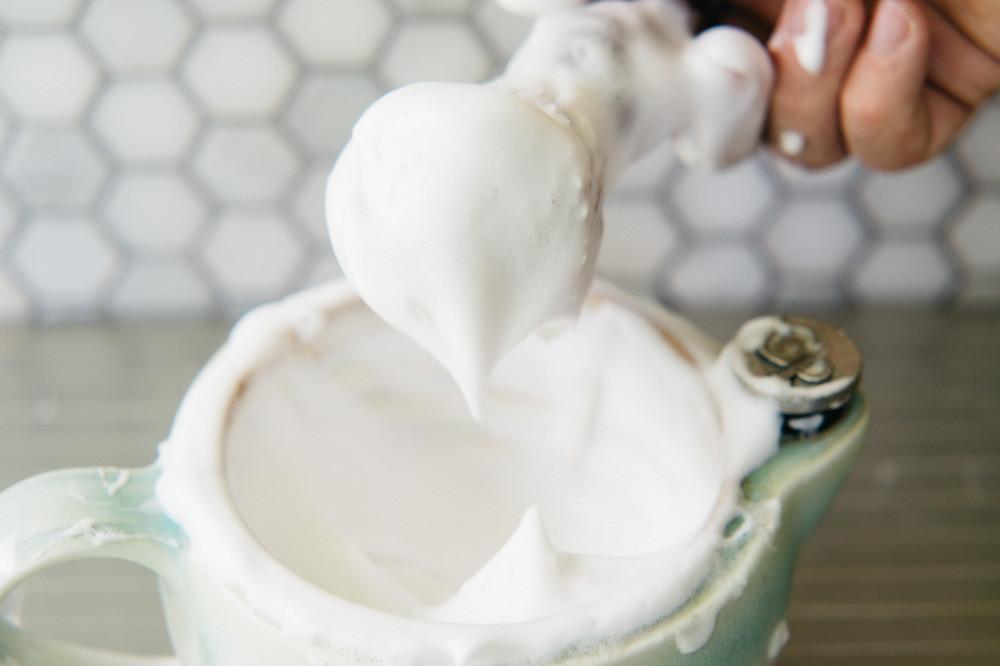
Apply the loaded brush to your face and neck using paintbrush-style strokes to distribute a thin layer, then switch to circular motions for 20–60 seconds to build up volume and heat. If the lather is too runny, squeeze excess water from the knot over the sink. If it feels too dry, add a small drop of water and continue. You'll know the lather is right when it's rich, structured, and you can no longer see skin beneath it. The longer you work it, the richer the lather and the smoother the shave.

5. Reapply between passes.
After your first shaving pass, rebuild for subsequent passes using the lather remaining in the brush. Add tiny amounts of water as needed to keep the consistency right.
6. Rinse and store.
When finished, rinse the brush under warm water until it runs clear. Squeeze out excess water gently — never wring or twist the knot. Dry the brush on a clean towel, then store it upside down in open air. A brush stand is the right way to do this — bristles pointing down, full air circulation, moisture draining away from the handle.

How to care for your shaving brush
The habits you build after each shave matter as much as any cleaning routine. A few rules:
- Never use water hotter than you can comfortably hold your hand under
- Don't mash or grind the bristles when lathering — aggressive bending can split or fray the tips
- After each shave, rinse thoroughly, squeeze gently, and dry in open air — never store a damp brush in a drawer or cabinet
- Let the brush dry completely before using again
- When squeezing out excess water, squeeze the knot — don't pull the bristles
- A new brush will naturally shed a few bristles early on; this is normal
For a full deep-cleaning routine (including the Castile soap and white vinegar method we recommend), see our dedicated guide: How to Care for and Clean Your Shaving Brush.
Ready to get started?
Shop the OneBlade Synthetic Shaving Brush → Shop Brush Stands →


